I love multi-function, high tech devices…so when I saw this new flashlight from Goal Zero, I had to pick one up and give it a try! It features an internal, non-replaceable lithium-ion battery and multiple lighting and charging options. At about $80 at Amazon, it’s hardly cheap…so is the cost justified? Read on to find out…
No camping trip is complete without a good cup of coffee in the morning! This is even more important when backpacking, as your surroundings are so idyllic that enjoying good coffee just caps off an already magical experience. With that in mind, this review is focusing on my quest to find a really good backpacking mug for coffee and tea.
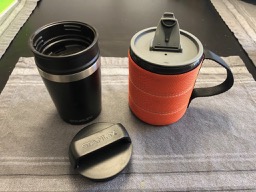
There are a few basic criteria any cup must meet. First, it must be at least partially insulated…it gets cold in the mountains of Colorado! Second, it must have a lid for sipping. Lastly, it must have a handle that I can use to clip it to my pack if I feel like it (translation – if I’ve packed too much and don’t have space for the mug inside my pack 😉 ). Shown above are my two current favorites.
GSI Outdoors Infinity Backpacker Mug
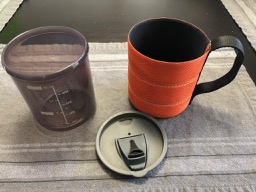
Let’s start with the orange one, The GSI Outdoors Infinity Backpacker Mug (starting at around $10 at Amazon, depending on color). The soft outer shell doesn’t provide a ton insulation, but does prove sufficient. it holds a cavernous 17oz, and has a sturdy lid – while the lid is just a friction fit, it’s snug doesn’t come loose. Another nice feature is that the plastic inner cup is removable and you’ll notice it has markings on it for up to two cups. This is especially useful if you’ve packed dehydrated meals and need to measure out hot water for those! All in all, a robust, quality mug that I used a ton last summer.
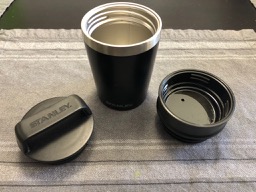
New to the game is the Stanley Adventure Vacuum mug, a story double-walled stainless steel option. At around $15 at Amazon, it’s more expensive than the GSI, but I have little doubt it’ll last longer. It’s really tiny, with a measly 8oz capacity, but what drew me to this, apart from the double walled stainless construction, was its clever lid system. There are two lids…one a sippy lid, the other a solid lid with a handle that a carabiner can easily clip to. You can use either lid, or – this is the clever part – both lids at the same time. So when packing, you screw the sippy lid on first, then the solid lid, and you’re good to go, with no concern about anything coming loose and falling off along the trail.
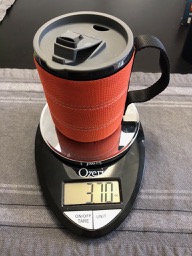
So, which is better? Well I love the ruggedness and double-wall insulation of the Stanley and for car camping, it’s an obvious choice, even with its minuscule capacity. But for backpacking, there’s one more important test:
The GSI Outdoors Infinity Backpacker Mug weighs in at a featherweight 3.7oz. It really is light, especially for its size. Plus, it has a second function, to measure liquids to re-hydrate meals. Bonus!
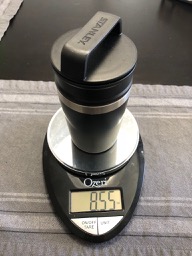
Ah, but then we get to the Stanley Adventure Vacuum mug, and its rugged construction really shows on the scales. This mug holds half the amount of the GSI, but weighs more than twice as much! 8.5oz, that’s just over half a pound!
Sorry Stanley. You’re an awesome mug and I love ya, but you won’t be joining me on any backpacking trips! We’ll hang out car camping sometime though, I promise. 😉
My HomePod arrived! I’ve been eagerly awaiting this product ever since buying an Amazon Echo in July of 2016 (more on that later). Apple is very late to the game with these smart speakers, so, how did they do?
So, this is really more of a long term review, of my favorite coffee making machine! It’s called the AeroPress (~$30 at Amazon), and if you think it’s basically a French Press…well you’re right…but looking at it the wrong way. Meaning…it’s more like an upside down French Press!
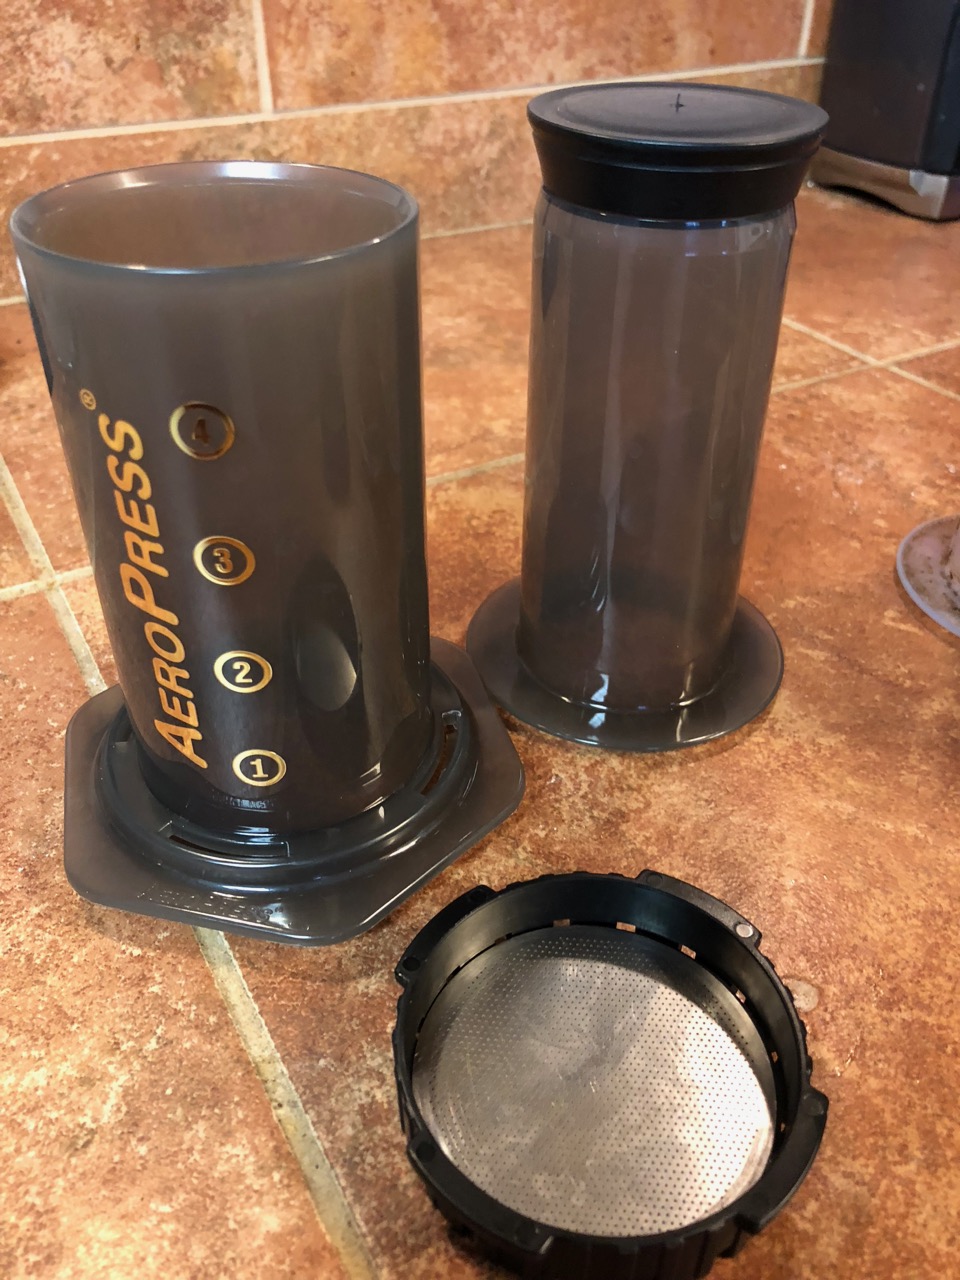
Here’s how it works. Stick a filter in the black cap part, screw that to the sleeve, add coffee, and set it on top of a cup. Add hot water…wait…then use the plunger to push the water out, into the cup. Similar to a French press so far, but now it’s time for cleanup…unscrew the black cap…the coffee grounds stay inside, just position over a compost container, push the plunger, and eject the coffee grounds into the compost. Rinse the parts, and enjoy your coffee! It’s quick, easy, and produces great tasting coffee.
Now, the filter…in the image here I’m stainless steel filter…this is an optional accessory I bought (<$15 at Amazon); the regular AeroPress comes with a few hundred disposable paper filters. Disposable is not my thing, so I opted for the reusable one (though I’m stuck with 350 paper filters that came with it…I’ll either use them up, or find some other use, I don’t want to just throw them away!).
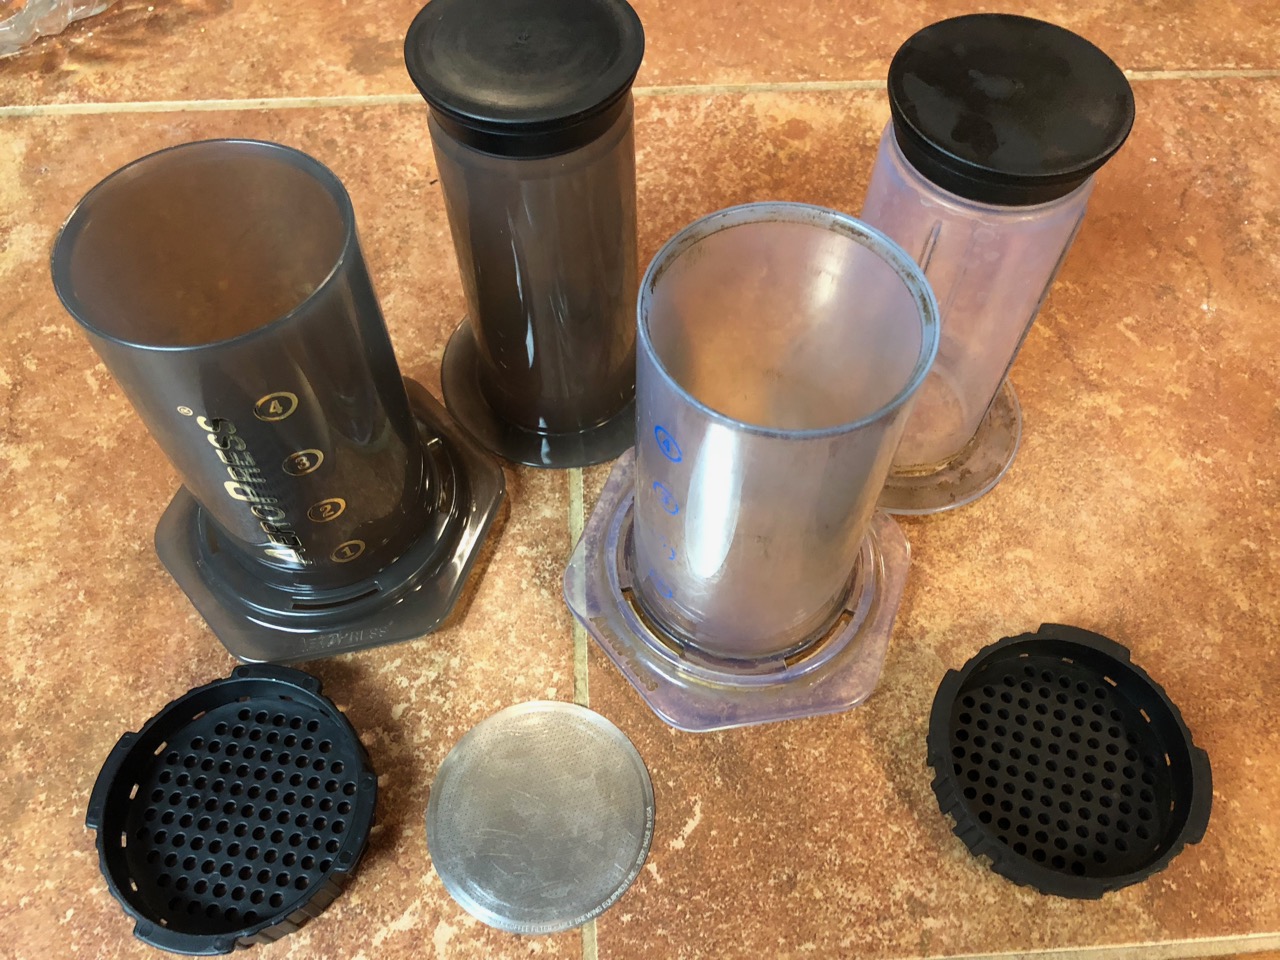
Also note my picture has two AeroPresses…well, my original finally wore out (the clear one on the right), after over five years of heavy use. The plunger seal deteriorated and won’t hold pressure, so it makes it tough to push the coffee out…and since the pressure you apply can affect the flavor, it was time for a new one. The design hasn’t changed much…you can see they’re now using a tinted plastic (probably to hide coffee stains if you just rinse it instead of washing it), and the plunger doesn’t have the exterior ribs on it anymore so is a bit of a looser fit in the sleeve (with no noticeable impact on performance). Other than that, it’s the same.
Some people get pretty obsessed with technique…precisely measuring the coffee, or water temp, or even *inverting* the press during brewing. You can have a lot of fun with these, but they don’t require that level of obsession to produce great coffee!
If you’re looking for an unbreakable, convenient, easy to clean way of making coffee, get an AeroPress!
I live in Colorado…when winter comes, I can either hop on a treadmill, or head out into the snow for a run! Perhaps someday I’ll do a review of my treadmill someday…but the mere thought of that beast sends shivers down my spine…so let’s focus on the joys of trail running in winter in Colorado instead. If you’re going to have fun doing that…you need the right equipment. There’s nothing better than running at night when it’s lightly snowing! Assuming of course you’re staying warm and cozy, and slipping and sliding all over the place. Again, it all comes down to having the right equipment…and after spending my winter training for an April marathon, I’ve found some equipment that works great for me. Starting from the bottom up, let’s talk about shoes, and my absolute favorite (for winter), the Trail Freak Winterproof from VivoBarefoot.
They’re very similar to the standard Trail Freaks, but with waterproof construction and a removable insole. These different materials result in a shoe that’s much smaller than Vivo’s normal sizes – I own several VivoBarefoot shoes (both on and off road shoes), all size 44, and these size 44 Winteproofs were really snug in the toe section (compared to the wide, loose feel in the toes in the others). After 180 miles in them they’ve loosened up a bit, but they’re still nowhere near as roomy as my Neo Trails. The liner can be removed (which results in a more normal VivoBarefoot fit, still slightly snug though by comparison), but with just a 3mm sole, I want to keep that in there to insulate my feet from the snow I’m running on. So, I cope, but consider ordering a size up from normal if you get these. I wasn’t sure how I’d like the drawstring style laces, and while I found they do loosen up a bit, the shoes themselves never felt loose.
Traction in the snow and ice is phenomenal; they use the same tread and sole design as the proven Neo Trails and Trail Freaks. Traction won’t be a problem. Running through puddles and slush is a breeze…water does get in around my ankle, but the rest of the shoe does a good job of keeping the foot dry (the tongue is not a loose piece, its sides are joined to the rest of the shoe like a waterproof hiking boot would be, this undoubtedly helps). Warmth is likewise never an issue, no matter what socks I wore, my feet were always plenty warm in temperatures as cold as 10F. The 180 miles on these were not easy miles, either…when conditions were good enough (only patches of snow), I’d use my Neo Trails…I turned to the Winterproofs when it was either snowing or there was significant snow on the ground. Sometimes that meant running on packed snow, sometimes I was breaking a trail through 6-8″. Whatever I asked of these shoes, they delivered!
Naturally, all this does come at a price…$160 is the latest advertised price on VivoBarefoot’s website. However, Vivo is always coming out with new colors for their shoes, sending the old colors to places like LeftLaneSports, so if you shop around, you can find a good deal on them (at the time of this writing, $97 at LeftLaneSports for example).

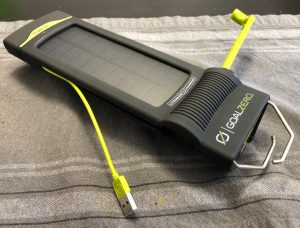 I love multi-function, high tech devices…so when I saw this new flashlight from Goal Zero, I had to pick one up and give it a try! It features an internal, non-replaceable lithium-ion battery and multiple lighting and charging options. At about $80 at Amazon, it’s hardly cheap…so is the cost justified? Read on to find out…